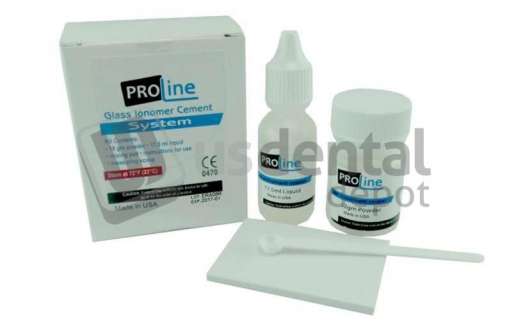
PRO-LINE Crown Cement Glass Ionomer - Type I Luting Cement Kit 18g Powder 17.5ml Liquid #010-020

Description
PRO-LINE - Glass Ionomer Cement Kit - Type I
Ionomer Luting Cements
# 010-020 - Mfg # 010-020
Feature:
The cement chemically bonds to enamel, dentin and metal structures.
Contains:
* 18g Powder
* 17.5ml Liquid
* The PRO-LINE - Glass Ionomer Cement Kit is an advanced formulation designed as a multi-purpose final cement for the cementation for crowns, bridges, inlays and onlays as well as certain orthodontic applications.
* Ideal for use as a liner under composite, amalgam or porcelain restorations where a thin lining is indicated.
* The cement in radiopaque and has cariostatic properties by naturally releasing flouride.
HOW TO CEMENT or RECEMENT A CROWN
A permanent crown, also known as a dental cap, is a Type of dental treatment that completely caps over a tooth or a dental implant and is a form of restorative treatment. A dental crown is required when the tooth either broke, decayed, or became damaged some other way. A permanent crown is also used to make the overall appearance of a tooth better. In order to fit a crown, the original tooth is drilled down until it resembles a small peg—this is what the crown is fixed onto using dental cement. The dental crown can be made from different compounds, such as porcelain, metal or a combination of the two.
Unfortunately, dental cement does not always stay in place which means a crown can work itself loose over time with the mechanical action of chewing, brushing, and even talking. Do you experience bruxism or teeth grinding from time to time, especially when you’re stressed? This is yet another cause of dental cement losing its efficacy and crowns coming loose.
How to Re-cement a Crown
Here, we will describe the best way to re-cement your crown if it has come loose until you are able to see your dentist for a more permanent repair. Nevertheless, there are times when it will not be possible, or at least is not advised, to attempt reattaching the crown yourself.
Holding the crown between your thumb and forefinger, have a look inside the crown to see if there is any soft or hard material left inside. If there is, it is possible that the remaining portion of your tooth has broken. Also, take a look at the tooth inside your mouth. Has it broken evenly with the gum line? If it unfortunately has, you should not attempt to replace your own crown—even temporarily—and should rather wait for an appointment with your dentist.
Is there any swelling or pain that is almost unbearable? This is another sign that you should wait until you can see your dentist instead of trying to re-cement your crown. If the crown is hollow, or at least mostly hollow, you can go ahead with cementing it back to the tooth. Let’s begin…
Step 1
Gather the equipment that you will need to fit your crown. A piece of kitchen towel to place the crown and implements on, something small such as the smooth end of a clean plastic spoon, to use to apply the cement. Most of the time, you can use the crown cement tube itself but if that is not possible, have something handy just in case. Grab a paper clip (handy to remove any bits from the inside of the crown), or a toothpick. You will also need floss to remove any excess cement after the application. Lastly, you will need a mirror—ideally the magnifying Type—and a Q-tip.
Step 2
Prepare the crown by removing any bits of material that may be left inside and rinse it out well with water. Leave it to dry.
Step 3

Fit the crown over your tooth. Does it fit correctly? If so, proceed to the next steps. If not, make an appointment with your dentist.
Step 4
Now it is time to re-cement the crown. Remove the cap from the product tube and punch a hole in the tube tip with the back of the cap. Squeeze a small amount of the cement onto the edge of the crown that is going to be at the base of the tooth. Use the Q-tip dipped in warm water to moisten the tooth, then place the crown over the tooth, pressing down firmly for a few counts.
Step 5
Bite down firmly to ensure it had been positioned correctly and to ensure a proper fit. If you find that your bite is not comfortable, remove the crown and follow all steps again. Once you have positioned the crown correctly, wait five minutes.
Step 6
If there is any excess material, now is the time to remove it gently using the floss. Then, rinse out your mouth well with some warm water only.
Allow at least an hour for the cement to set before eating or drinking anything, but keep in mind that it will take around one to three hours for it to set completely. A good tip is to apply the cement just before you go to bed because it will help to form a stronger bond since you won’t be eating or drinking while you sleep.
Final Thoughts
Please bear in mind that although we recommend the Recap it Temporary Crown Cement, this is not a miracle product (there isn’t one available over the counter) and you should keep hard or chewy foods away from the affected tooth. It is okay to chew food lightly over the area, but no chewing gum, toffees, or nuts, for example. Also, remember that temporary crown cement should only be used as an interim solution to keep your crown in place until you can see your dentist.

